Tag Archives: UFO

The Six-Pointed Star UFO Is Still a UFO

but it’s a lot farther along than it was!

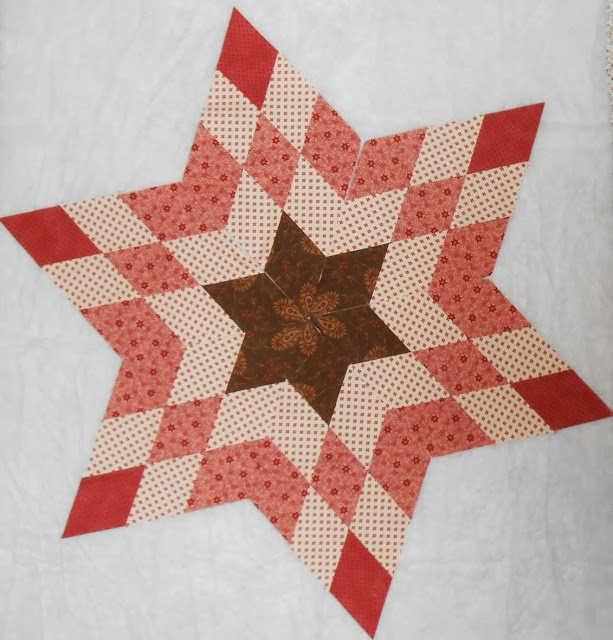
Remember where I started with six star points and no real plan? Then I figured out how to set the points in their background fabric and made more borders.

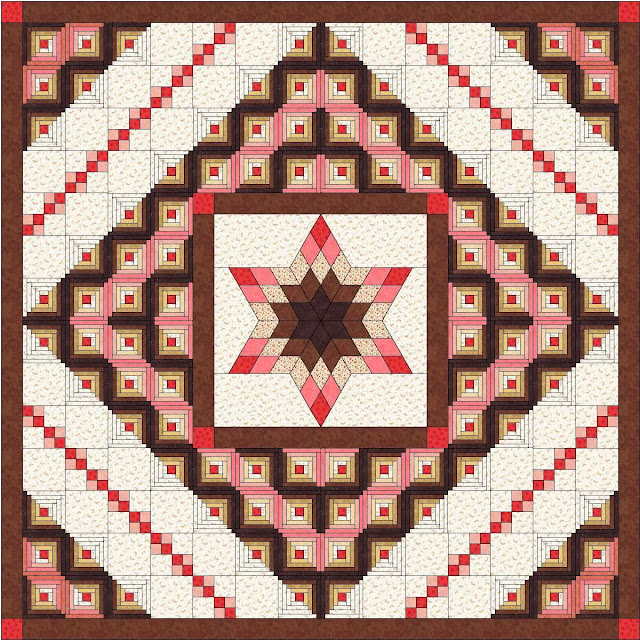
I played with EQ7 to try some ideas for finishing. (Oh yes, in case you wonder, there were many more versions drawn!)

I started on the third of these, making 40 chain (double 4-patch) blocks and cutting the alternate blocks. The chain blocks didn’t have enough visual weight to balance with the center, so I switched gears.

This is the result so far, after a fair amount of unstitching and restitching.

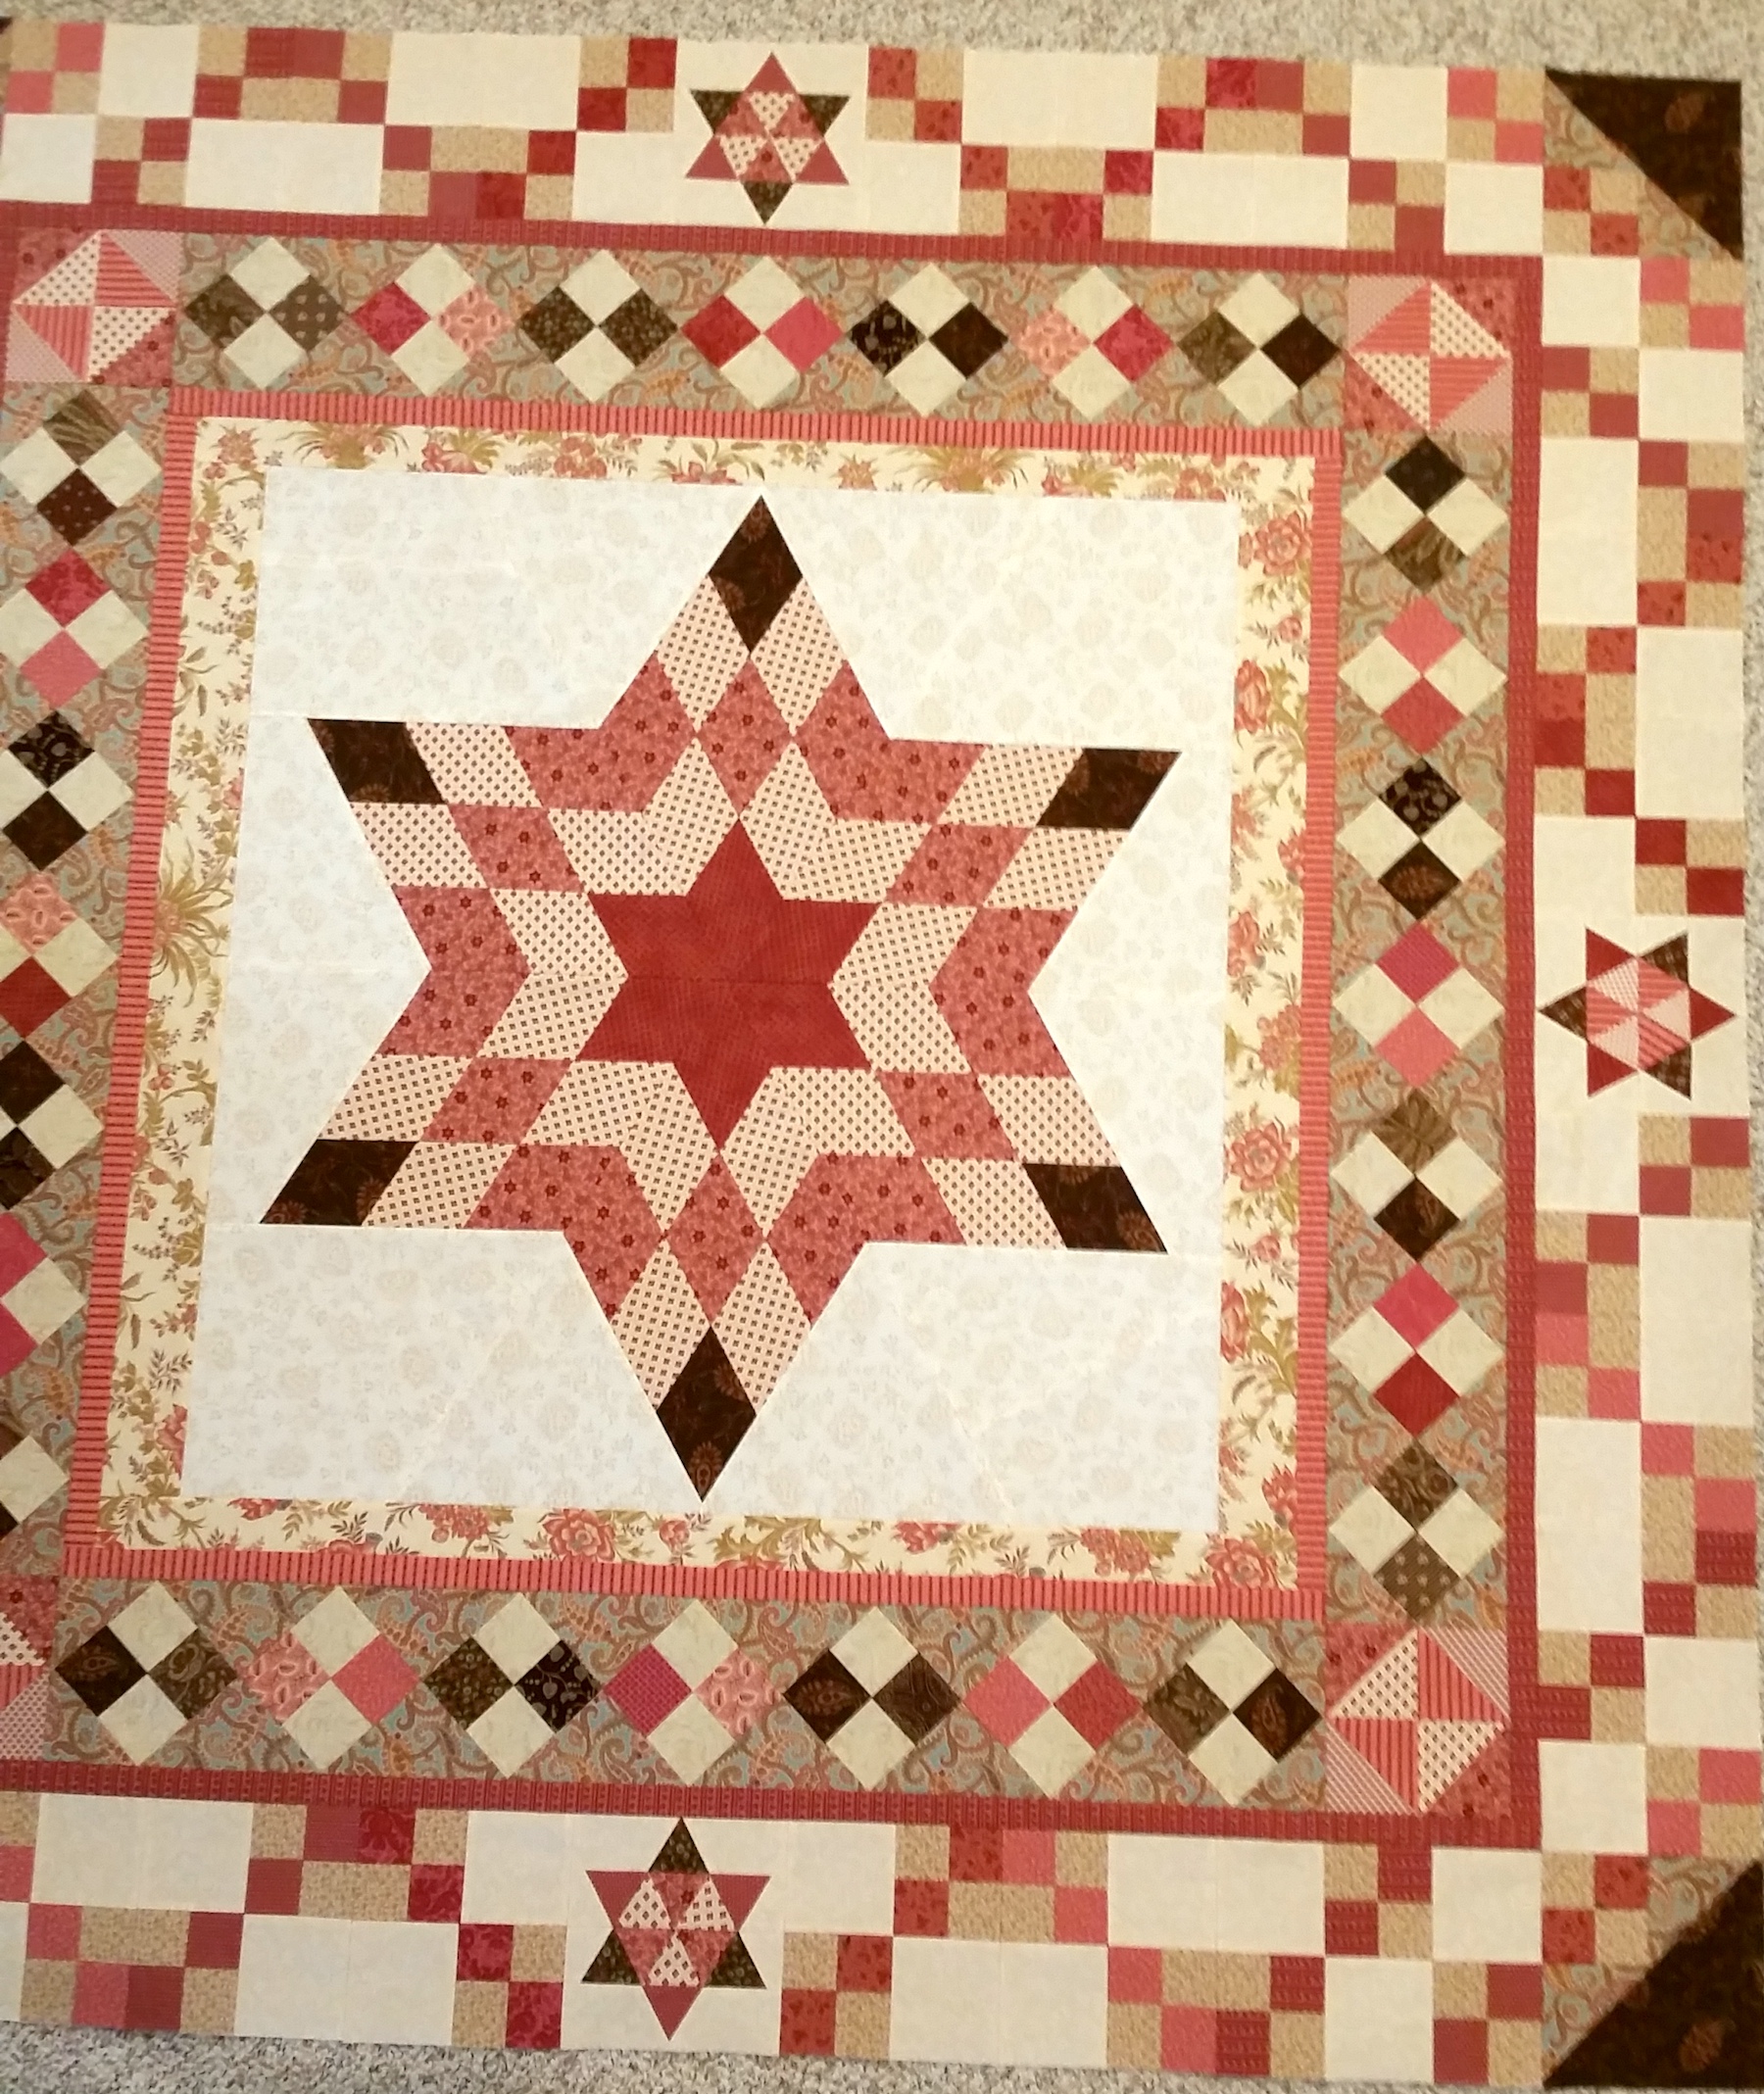
As often, it is too big to take one decent picture of it on the floor. I simply don’t have enough head room above it to get the camera high enough.

Those are dark brown triangles in the corners. They look just right in real life, though in the photos they don’t thrill me. The triangles, along with the diagonal lines of 4-patches, provide the weight in the corners I was missing before. The diagonal lines there and throughout the chains give movement. And the value changes from light background through dark triangles provide the contrast I like.

The small 6-pointed stars centering the borders repeat the star shape in the quilt center. I wondered if they would look too small and fussy, but overall I’m happy with the effect. They were kind of a pain to make. I might post again about making them.

Right now it is about 70″ square. I’ll add another 1″ border, as well as a wider outer border to finish. I don’t have those fabrics in my stash, so will need to shop for the right thing. There are too many other things to do right now, so that will wait, and the UFO will stay a UFO for a while longer.

Finding Balance with Visual Weight

I’m working on that UFO. More accurately, I’ve stalled working on that UFO, because of balance problems.

Last time I showed you a couple of ideas for finishing the 6-pointed star with borders. Both were good ideas, and I kept playing in EQ7 to refine them. This was the winner:

Pretty, huh? I liked the airy way the chains of 4-patches wrapped around the center. After arriving home over the weekend, I set to work making 40 double-4-patches to construct the borders. They finished well, and I was excited to lay them out around the center. But I don’t like the look at all. They definitely look better in the drawing than they do in real life.

The balance is all wrong. The visual weight of the center (everything in the center so far, including the 4-patches on point and the 1″ dark pink border outside of them) is too heavy, relative to the weight of the chains. The difference is so stark, the border chain blocks seem completely disconnected from the center, as if they are from different quilts.

Unity: the design principle that all the elements and components of a design look like they belong, that they are unified, or one.

Balance: the design principle that elements and components of a design have equal distribution of visual weight.

My chains are not well balanced with the center, and in fact, are so badly balanced as to look like they don’t belong.

Sigh… 

So it was back to the literal drawing board of EQ7. I have a tentative plan, but you might understand that I’m shy about showing it right now. First I’ll see if it works.

How is your week going? Are you making good progress, or are you in steps-forward and steps-back mode, like I am?

A New Plan for an Old UFO, Part 2

Where I left you last time was having solved the problem of setting the star points into background fabric without using Y-seams. I also showed you an idea for a quilt design using log cabin blocks. It’s pretty, but I really have no interest in making it.

This is where it is so far. At this point it finishes at 54″ square. 

The question is, what to do next? Often I begin a quilt with a center and two or three borders, designed in my mind and with scratch paper, and made directly. When it’s time to add more borders, I often switch to EQ7 for design help. It gives the advantage of trying out ideas without making them. With unlimited iterations possible at virtually no cost, there is not much downside. I did the same for this one.

Here are a couple of options, drawn in EQ7.

Original design in EQ7, 82″ square.

Original design in EQ7, 93″ square.

I like them both, but I have a pretty good idea which direction I’ll go with it.

A New Plan for an Old UFO

I’ve often boasted about not having many UFOs (UnFinished Objects, or quilt projects that haven’t been completed.) Why that would be something to brag about, I’m not sure. But it’s true, usually I finish what I start.

There is one long-time UFO, started several years ago.

There were multiple reasons for not proceeding with this. One issue was technical — I wasn’t sure how to do the Y-seams to set the points in a background. (Above they are not sewn together, just arrayed on batting to show them.) Another was that, once set, I didn’t have a good idea of how to show them off.

Almost four years ago I posted More of an Idea than a Plan. In it I showed one option for setting these star points.

I didn’t do this. I still like the idea, but I’m really not interested in making those log cabin blocks. Also, it turns out that the center resulting from the star points is bigger than I thought. Adding all those log cabin borders would make this a fairly humongous quilt. If that weren’t enough, I still didn’t know how to set the star points in background fabric.


Recently I got the star points out again. It turns out you can avoid using Y-seams if you extend the points with background fabric. The blue lines below illustrate the extra seams. The star block has six big segments, each consisting of a star point and two pieces of background fabric. Put together two star halves, and then stitch the long seam to create the whole block. Easy peasy.

The constraint I faced was not having quite enough background fabric. If you look again at the block above, you can see that the star itself is not the same width as height. The star points do not extend all the way to the sides. To make the block square, it requires “enough” background fabric to make the height and width equal. I didn’t have quite enough.

That gave me the next opportunity for problem solving. The easiest two ways to make a center square are to 1) trim it to square or 2) add borders to make it square. I had nowhere to trim; adding borders of different widths was the best choice.

The photo below shows my solution. To all four sides, I added borders of floral print on cream background. The top/bottom borders are narrower than the left/right borders.

The one-inch strip border in coral encloses all that and creates the illusion of uniformity. At least, for me it helps make the width differences disappear. That strip takes the center to 42″ finished.

The final border so far uses 4-patches on point for the edges, and broken dishes in the corners. I’ve talked before about using “easy” widths for borders, to make them divide into square blocks. This works even with blocks on point. With an edge of 42″, I divided it into 7 equal segments to have a 6″ border. 42″/7 = 6″.  Then I used the math of diagonals to find the correct block size. 6″/1.414 = 4.25″. Each of the 4-patches is a 4.25″ block. When set on point, they make a 6″ wide border.

It isn’t magic, and it isn’t mysterious. It’s just math. If I didn’t know all that and still wanted to use blocks on point, I could have made them any size and simply had them not fit perfectly. AND THAT IS OKAY!! And TRADITIONAL!!

Alrighty. This post is too long already. I’ll finish it soon with showing you a couple of options for the remainder of the quilt layout.

Putting It Off

Why do you put off working on a quilt project? Here are a few possibilities:

* I don’t have the supplies I need
* Parts of the project got scattered, and I don’t know where they are
* I don’t know how to do the next step
* I don’t like what I’ve done so far
* It’s boring or tedious or just plain hard
* Non-quilting parts of my life are taking my time and energy
* I’m mad (or something) at the person it is for
* I got distracted by a different quilt project (ooo! shiny!)
* The deadline is coming up, so I’m waiting to do my best work under pressure

If you have a lot of UFOs, any or all of these reasons might apply.

I never have many UFOs, but that doesn’t mean I don’t put stuff off. I’m doing it right now, in fact! The reason? I don’t have the supplies I need (good textile markers,) and I don’t know how to do it. And I have lots of other things I could choose to do instead. The fact that there is a deadline looming doesn’t make me delay; it just adds stress to it!

The other day I mentioned my guild’s annual challenge, to be presented in less than two weeks. This year the challenge is to create a quilt inspired by Iowa. There is no size or technique limit. However it must be quilted through three layers, bound, and labeled.

I have a start on my project, and I have ideas for how to proceed. The photo below shows a map of Iowa lying on top of pieced fabric. I used blue tape to draw a “dead body” outline around it, so I know the basic outline within which I’ll work. My plan includes some text, as well as at least one wind turbine. But the other elements are harder to envision. And in truth, I don’t know how to execute my ideas!

20160621_115949

What does that mean? I can keep putting it off and miss this opportunity to try new things. Or I can get busy, learn how to write text on fabric, play with sizes for wind turbines, and have some fun! What’s the worst that would happen?

Why do you put off projects? What great (or lame) ideas do you have for my Iowa quilt? Do you have advice or encouragement for me? Let me know in comments.