Welcome to Catbird Quilt Studio’s Medallion Sew-Along! If you’re just joining us, you’re not too late. Parts 1, 2, and 3 of the Sew-Along, and other resources, can be found under the Medallion Sew-Along tab. To join in and receive updates, just follow this blog.
Earlier this week I addressed some of the size issues that arise with quilt borders. They can happen for all kinds of reasons. If you use a border stripe, its width almost surely will leave you with an oddly-sized center. If your piecing isn’t accurate, things can get out of whack. Or maybe you were determined to use every last inch of a perfect fabric. I encourage you to take a look at the post.
Remember as you consider the next borders, my emphasis is on piecing. I’m comfortable with it. However you may want to add applique, curved piecing, or another interesting option.
Below, as always, I have instructions for those doing Track 1 and those doing Track 2. I recommend you read both sets, regardless of your own quilt plan.
TRACK 1 — THE 15″ CENTER
The first border set, whether you set your block on point or straight, took your center to 24″. The second border set added a 4″ border, taking the border to a total size of 32″ finished.
For the third border set, add a 2″ border, followed by a 6″ border. This will take the finished size to 48″. For some of you, the 6″ border might be the last. Most of you will want at least one more after this. Think about that while you plan, and what still may be needed to complete the design.
A comment about the 2″ border: this border is a great place to make size adjustments, helping things stay on track through the finish. Before adding the 2″ border, measure your center carefully. I usually smooth the work out on the floor and use a fabric tape measure. I measure up, several inches “above” the corners, straight across. I usually use a seam line as my guide across. The unfinished measure before the 2″ border should be 32.5″. Is it?
If not, adjust. Using finished measures below
X = length of actual border
Y = length you want the border
Z = Y – X = total adjustment
Example: your finished size actually is 32.25 rather than 32″, and you want 36″ once the border is added. The narrow border should add a total of 3.75″, or 1.875″ on each side, rather than 2″.
All the colors of your quilt should be included by now, though you might still introduce variations of value. Any new borders must continue to support what has come before. Repeating shapes and colors provides harmony. Varying size and placement continues to add interest.
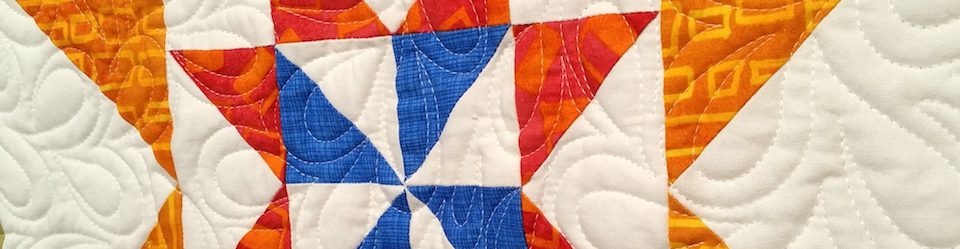
Since I was away four days last week, I lost quite a bit of sewing time. Here are the two I have with both the 2″ and 6″ borders.

Each unit of the 6″ border is a double 4-patch. I like the way they echo the other zigzagging lines.

The 2″ border is unpieced strips, separating the checkerboard from the friendship star 6″ border. I’ve completely depleted my navy stars fabrics, so this may be the last border for this one. If I add anything, it would be one more unpieced strip.
Here is one more illustration of a border to come.

This may not be final layout, but I like the XOXOXO pattern.
In a few days I’ll post more ideas for this border set.
TRACK 2 — ANY CENTER BLOCK
Last time I asked you to add a border or border set between 3″ and 6″ wide. How big is it now?
As before, you may need to add another frame, either for size or to control color and space. That frame could be all one fabric. Or you could “log cabin” around with different pieces. When your current finished size is easily divisible into units, you have choices of what units to use. Also be sure to check out the post linked above on problem sizes.
The next border(s) you add need to maintain harmony with what’s come before. Consider if there are colors to emphasize, value contrast to strengthen or diminish, or shapes to repeat. Also think about how large you want the quilt. Are the existing borders busy? Is it time for a breather with something simpler, or vice versa?
Proportion is important when deciding how wide to make the next borders. As you move toward the finished top, your borders can be somewhat larger than more central ones. You might want to repeat a shape from earlier, but in a larger size. If you want to elongate the quilt (to make length of sides more different,) this is one of your last chances to do so. Likewise, if it is not square now but you want it square when done, you should move it that way on this round.
I suggest the next border set be at least 4″ wide, and perhaps up to 8″. Again, your own top will help you decide the right moves. Always ask if you want another opinion. Opinions offered for free…
Here is my baseball top, as it is so far.
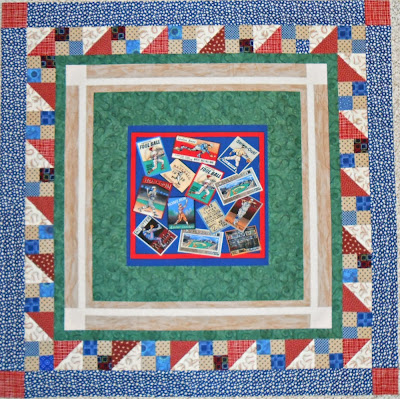
My sisters recommended the blue edge after the busy pieced border. The pieced border alternates 4-patches and HST.
My next moves are to add borders top and bottom, but not on the sides. I’m planning square-in-a-square, on point. These are easy for the math.
I’ll trim the center to finish at 40″. The square-in-a-square borders will be 5″ wide, with 8 units on each. I’ll use side setting triangles for the green, rather than reframing each individual block.
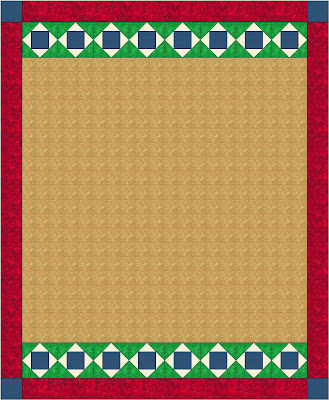
Center, bordered top and bottom with square-in-a-square, and framed with last border, maybe in red.
The math: the center of the block is half the width of the whole block. You start with this.
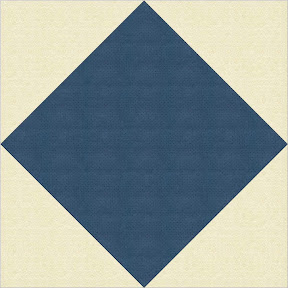
Blue square finished size, times 1.414, gives finished size through white framing. Example: 2.5 x 1.414 = 3.535
When you turn it on point again, you multiply by 1.414 again.
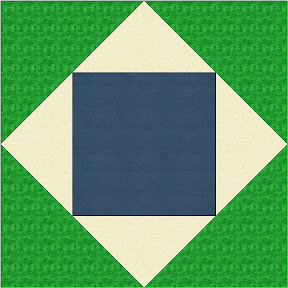
Now multiply the finished size through white framing times 1.414 to find the finished width of the whole block. Ex: 3.535 x 1.414 = 4.999, or 5″.
So for whatever your total width of border, the center of the block (in this case, blue) is half the width. My blocks’ total width is 5″, so I’ll begin with 2.5″ (finished) blue squares.
One more comment: when I cut setting triangles for either sides or corners, I cut them over-sized and then trim after attaching. This is one place my quest for accuracy fails me, if I cut to the “correct” sizes.
WRAPPING UP
I need to push out the next official MSA blog post, so I can catch up on my samples. MSA Post #5 is scheduled for October 16. Between now and then I’ll visit the AQS Des Moines show with my sisters. Look for a GIVEAWAY of something(s) fun that I find there!
(Just so ya know, any giveaway will require PICTURES! and/or COMMENTS! and/or BLOG POST LINKS! to show your progress. Get ready. I can’t wait to see what you’re doing!)

Hey the baseball theme one is looking really good. I also love the orange and blue stars. You know I would find something orange and wild and add more borders as I like big, I like busy. See you soon!
Thanks for the tip on the baseball one. I like the blue border on it a lot. And the orange and blue stars galaxies is sure growing on me!! I wasn’t sure I’d like it at all — very different for me. But … I like it. 🙂
Just dropping in to say hi. oxoxox
Hi back! xoxoxo