If you love medallion quilts and you love triangles, you just about have to love Delectable Mountains medallion quilts.
 A couple of weeks ago I was paging through medallion quilts at the International Quilt Study Center & Museum. You can search the collections using a number of different variables, including keywords, primary pattern, quiltmaker, origin, and more. At the time I used the keyword “medallion” and found 181 examples. Within that set there are a number of glorious DM medallions.
You can also use “Delectable Mountains” or “Delectable Mountains variation” to look specifically at these. Some are medallions and some are block or row quilts. I’d love to show you images here. However the legal permissions information is confusing and I choose not to risk it. You can find them this way:

I was inspired by the simplicity and high contrast of the design, and decided to make it as a red and white quilt for my guild’s June show.
There are two basic ways to create a Delectable Mountains block. One is the way I made my DM quilt last year. It uses large half-square triangles that are sliced into segments. Once the segments are rearranged, they created a jagged block.

Still Climbing Mountains. 57″ x 64″. August 2016. Made from stash. Photo by Jim Ruebush.
I thought I would use this block style to create a medallion. I thought it would be “fast” and “easy,” as the block quilt above was. However, the block is not square (in mine it finishes at 8″ x 9.5″.) The non-square block creates some math issues for the outer borders, making it neither fast nor easy.
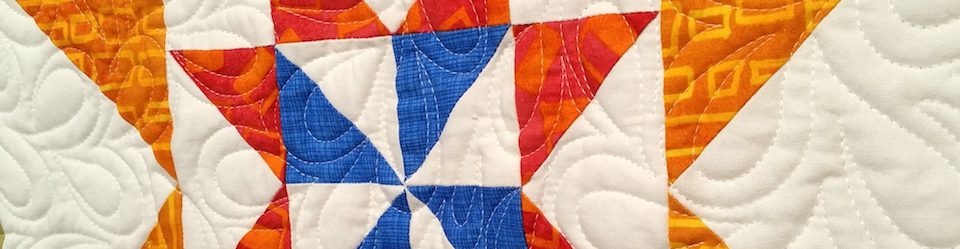
Yesterday while I cleaned extensively in my studio, I rethought my plan. The other option for a DM block is very old-school, with multiple small half-square triangles to make the points. Here is one link that shows how. (I haven’t reviewed it for accuracy or readability.) And here is a picture to give you an idea of the method:

I also checked a few of my books, to see if any had a good pattern I could pull from. One does, but it’s a badly written book with a badly written pattern. In the end I decided to do what I usually do: make it up as I go along.
Because it’s an uncertain process, I chose to make it first in pinks and browns, rather than red and white. If it all goes well, I might make it again. 🙂
This project falls squarely in the set I’d call a challenge and an opportunity. Realizing that my first plan wasn’t workable as considered created a barrier. Choosing to go old-school with construction provides the opportunity.

Before realizing I want a bigger block…

A center block using a few old favorites, and new brown fabric. The block is an odd size, finishing at about 11.5″.

Now you can see some mountains. The next border will have more of them.
So far this actually has been easy. The center block is a variable star. It is set on point with brown. Then the brown is bordered by a row of brown half-square triangles, creating the mountains. Finally, the whole center (everything made so far) was put on point again. See my post about putting blocks on point.
Next comes a border of brown mountains with double pink background. This is the one with a little trouble on the math side. But I’m confident I’ll find a way to make it work.

The modern part of me wants you to STOP with the center medallion and surrounding neutrals. But of course that wouldn’t make much of a medallion quilt 😉 Off to a good start, anyway!
It’s nearly done now. It will be “pretty” but ultimately not very interesting, I think. That’s okay. I’ve had fun making it.
The quilt study resource is wonderful! I like the old-school way of making the blocks–I can get my head around old school, it seems . . . .
I’m find it very soothing and satisfying. It’s going very well so far!
Wow I like the variation on delectable mountain! Thanks for the link to the International Quilt Study Center 🙂
Yep, both styles are useful in different ways. Sort of like having another tool in the kit. 🙂
Thanks for the two reminders in this post. One, The International Quilt Study Center’s index is a marvelous resource that I don’t use enough. Two, you made me recall why I don’t do quilts where I have to fiddle with getting everything to fit just so. I can do the math, but I always get into trouble when measurements are in 1/8 of an inch. I’ll await the next round of this one with interest.
Yes, the museum/study center is an excellent resource, and there are a handful of others I look at, too. Guess I should cobble together a list and a blog post to share them with others.
As to the fine measurements … yeah. I’m reasonably good at the math and I can get pretty confused sometimes, too. 🙂
I have a question: If the block terminated in a point instead of a fork, would it be not a ‘proper’ DM block? Only it occurs to me that if it’s simply the zigzag shape you love, could you add an extra strip which finished in a point, and gave you a square finished block? Your strips would be narrower, but I think (and as you know, math is not my strong point) you might be able to achieve a square. Do tell me if I’m babbling, as this is all theoretical; there’s no way I’ll ever get up the nerve to try and make one of these, by either method.
Yes, I’ve seen people modify the “new” version of the block with an extra strip to turn it into a square. And yes that strip could end in a pointed shape, too, but it would be narrower and would finish at the same “height” as the next strip does. Simply cutting the same original HST into more pieces will not get you there, as each extra strip cut means more taken out in seam allowances, so it would actually go farther from square.
As to nerve, I think you should try the new version. It’s actually quite simple and with cutting instructions from someone else, does not take any math at all, only making good cuts and seams.
I tries the HST method last week and like you then discovered they they did not make a square. Will have to try the old method!
I do love the HST block, but it’s a bit more more limited. Today I saw a neat quilt top in Instagram that used them for a medallion. That quilter used a spacer at the outside corner side. It was a clever construction and looked great.