
From worst to first? Somehow I managed to take my most problematic medallion start and turn it into my favorite finish so far.
15″ center using Track 1 instructions
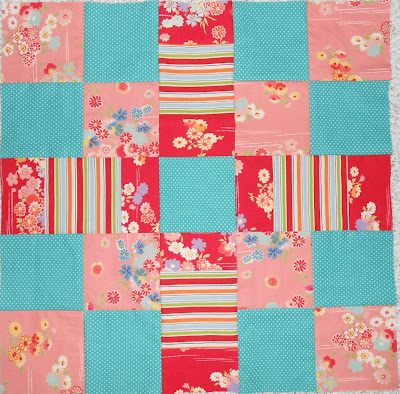
See any problems? I do. Too few colors, too little value variation. In addition, it is very blocky with only squares and rectangles, no triangles. Making borders support this center would be tough. I got this far and wasn’t sure what to do next. To create some contrast, I added the first border including a 1″ print of pale aqua. I think it worked pretty well, but still wasn’t enough.

Added a 1″ frame and 3″ border of flying geese. This is border set 1.
You can tell, leaving the red angles in the centers begged to extend them out to points. And I still needed more color. I consulted with my sister Cathie way back in early October and she helped me see better what colors could be used.

Yellow, blues, green, lavender… lots of colors to choose from.
I decided to add lavender, but it was already late in the game. In order to make later borders relate to the interior, I did some surgery. I inserted triangles in a couple of places. Can you find it?

Border set 2 was 4″. This shows 3″ of it, using the sawtooth half-square triangles in yellow. The red extends to create points.
The yellow brightened prospects considerably. I tried several variations of the yellow and turquoise sawteeth before sewing them on. I tried different corner blocks, too. EXPERIMENT! My word for the year.
Once I got this far I was pretty excited.
According the Track 1 instructions, the border including yellow was to be 4″. But the sawtooth part of it was only 3″. Then the last border set would be 2″ and 6″. I decided to stop the sawtooth border where it was and include the last inch with the next 2″ border. In this way it became 3″, to be followed by 6″. Clear as mud, huh?

Strips use the lavender from the surgically-inserted triangles. And the corner blocks add a lime green. It shows up before now, but in the prints.
The final border of 6″ would be my last puzzle. (Nope! I also had to decide binding and backing fabric, as well as quilting!) I opened EQ7 to try out a couple of things. My first try was pretty random and used all the colors already presented. After refining a little, I built the border as drawn. Then it was finished with the red for binding.

Sparkle, made using Medallion Sew-Along Track 1. 48″. Finished January 2014.
I learned a lot with this little quilt. Lessons included color, value, and shape variation and how to correct for problems; how to use strip borders to rest the eyes; and how to fracture color into the outer borders.
More than that, I learned lessons in patience and experimentation. It’s true that not all quilt designs are salvageable, but this one was. I persisted and the resulting quilt is one I love.
If you’re interested in the Medallion Sew-Along, see posts under this tab. There are instructions, inspirations, design coaching, and a lot of other information. And please be sure to ask if you have questions. I love to hear from you!

wow! you really have a gift for this! i am so thrilled to have seen these!
Thanks!!
Quite a save! A very strong finish.
Thanks! And thanks for taking a look.
Melanie, even before I scrolled all the way through to the final product, I was saying “yellow” to myself! The yellow is what it needed; it made the center block pop and made those half-squares also stand out. I love the simplicity of the center block, then expanding on technique and you go to the edges. Beautiful quilt; sometimes those projects that aggravates us the most turn out the prettiest.
Thanks for looking. I think the yellow added the right “hot” and “sharp” to the relatively cool colors in the center. Even the red (color best seen in the very first photo) has a cool note to it. And I think the yellow is where the sparkle comes from.
I have yet to make a medallion quilt but I’m enjoying seeing your process and the end results. This challenge ended well! Doing a medallion quilt will be on my to-do list this year.
I’ll be watching your blog for it! Let me know if you have questions.
Thanks for stopping by to take a look.
This one is fantastic. You really did rescue it with all your additions. Bravo! Perfectly balanced. I love it.
Thanks, Kathy. It was fun … once I got past the worst barriers!
Wow! The yellow and blue are not colors I would have thought to add but they really made the difference. I love it!
Yes, my sister really helped me see the color better. They did make a huge difference. The blue as you mention, and I’ve called “lavender”, is more of a cornflower blue. Whatever it’s called, it was just right. Thanks so much for taking a look and commenting.